Projects for GitLab Pages and URL structure
What you need to get started
To get started with GitLab Pages, you need:
- A project, thus a repository to hold your website's codebase.
- A configuration file (
.gitlab-ci.yml) to deploy your site. - A specific
jobcalledpagesin the configuration file that will make GitLab aware that you are deploying a GitLab Pages website. - A
publicdirectory with the static content of the website.
Optional Features:
- A custom domain or subdomain.
- A DNS pointing your (sub)domain to your Pages site.
- Optional: an SSL/TLS certificate so your custom domain is accessible under HTTPS.
The optional settings, custom domain, DNS records, and SSL/TLS certificates, are described in GitLab Pages custom domains and SSL/TLS Certificates).
Project
Your GitLab Pages project is a regular project created the same way you do for the other ones. To get started with GitLab Pages, you have three ways:
- Use one of the popular project templates bundled with GitLab.
- Fork one of the templates from Page Examples.
- Create a new project from scratch.
Use one of the popular Pages templates bundled with GitLab
Introduced in GitLab 11.8.
The simplest way to create a GitLab Pages site is to use one of the most popular templates, which come already bundled with GitLab and are ready to go.
Fork a project to get started from
If you don't find an existing project template that suits you, we've created this group of default projects containing the most popular SSGs templates to get you started.
| Fork an example project | Deploy your website | Visit your website's URL |
Watch a video tutorial with all the steps below.
- Fork a sample project from the GitLab Pages examples group.
- From the left sidebar, navigate to your project's CI/CD > Pipelines and click Run pipeline to trigger GitLab CI/CD to build and deploy your site to the server.
- Once the pipeline has finished successfully, find the link to visit your website from your project's Settings > Pages.
You can also take some optional further steps:
-
Remove the fork relationship. The fork relationship is necessary to contribute back to the project you originally forked from. If you don't have any intentions to do so, you can remove it. To do so, navigate to your project's Settings, expand Advanced settings, and scroll down to Remove fork relationship:

-
Make it a user or group website. To turn a project website forked from the Pages group into a user/group website, you'll need to:
- Rename it to
namespace.gitlab.io: go to your project's Settings > General and expand Advanced. Scroll down to Rename repository and change the path tonamespace.gitlab.io. - Adjust your SSG's base URL from
"project-name"to"". This setting will be at a different place for each SSG, as each of them have their own structure and file tree. Most likely, it will be in the SSG's config file.
- Rename it to

Create a project from scratch
-
From your Project's Dashboard, click New project, and name it according to the Pages domain names.
-
Clone it to your local computer, add your website files to your project, add, commit and push to GitLab.
-
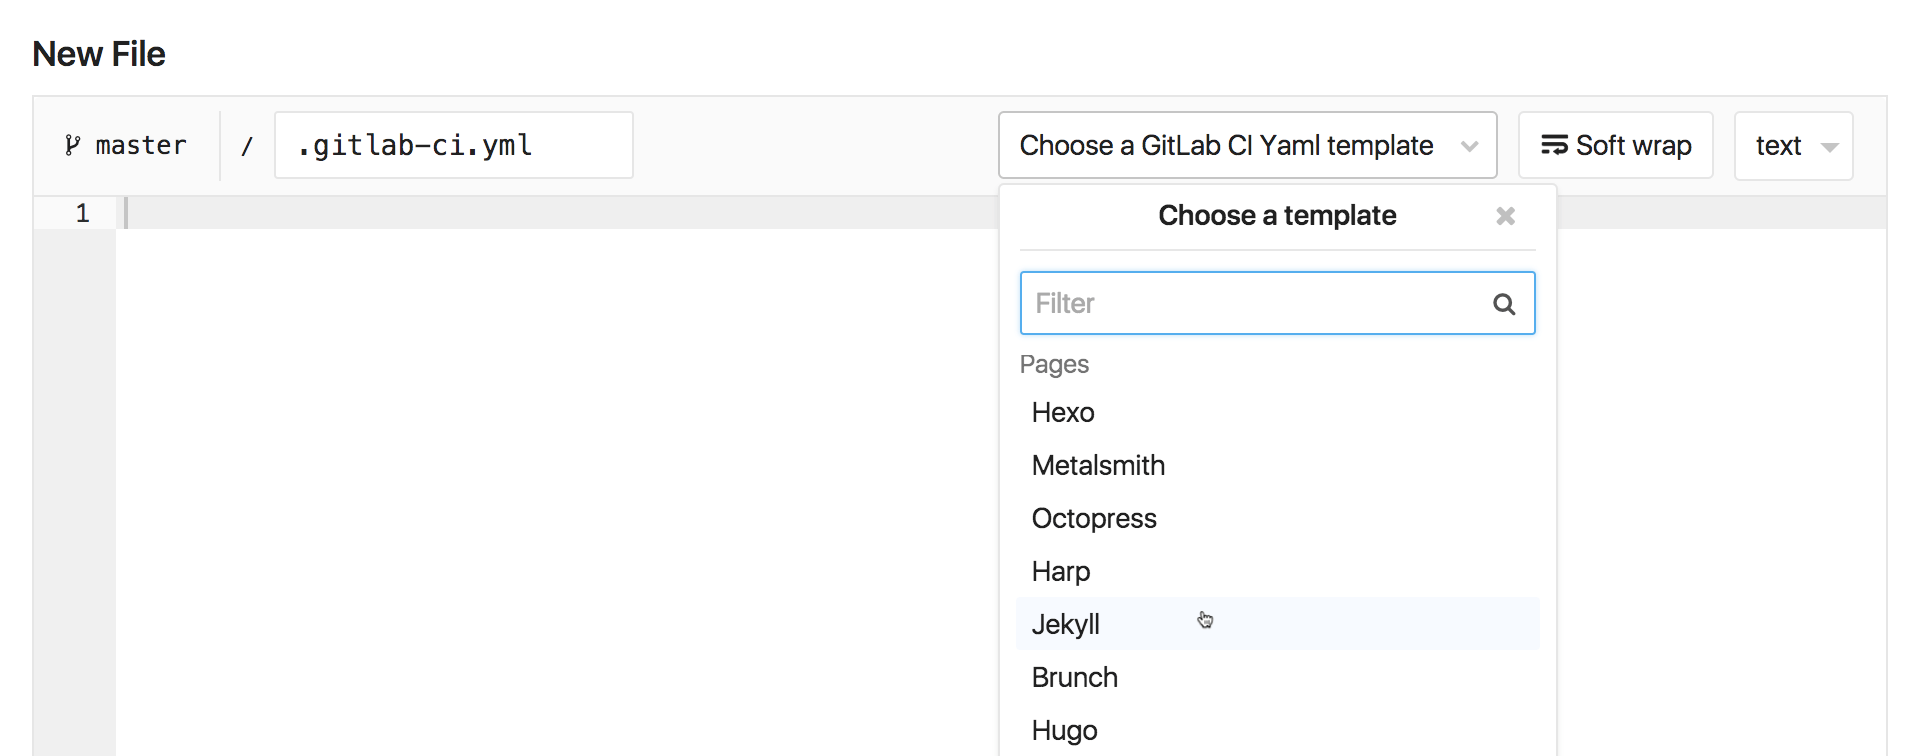
From the your Project's page, click Set up CI/CD:
-
Choose one of the templates from the dropbox menu. Pick up the template corresponding to the SSG you're using (or plain HTML).

Once you have both site files and .gitlab-ci.yml in your project's
root, GitLab CI/CD will build your site and deploy it with Pages.
Once the first build passes, you see your site is live by
navigating to your Project's Settings > Pages,
where you'll find its default URL.
Notes:
GitLab Pages supports any SSG, but, if you don't find yours among the templates, you'll need to configure your own
.gitlab-ci.yml. To do that, please read through the article Creating and Tweaking GitLab CI/CD for GitLab Pages. New SSGs are very welcome among the example projects. If you set up a new one, please contribute to our examples.The second step "Clone it to your local computer", can be done differently, achieving the same results: instead of cloning the bare repository to you local computer and moving your site files into it, you can run
git initin your local website directory, add the remote URL:git remote add origin git@gitlab.com:namespace/project-name.git, then add, commit, and push to GitLab.
URLs and Baseurls
Every Static Site Generator (SSG) default configuration expects
to find your website under a (sub)domain (example.com), not
in a subdirectory of that domain (example.com/subdir). Therefore,
whenever you publish a project website (namespace.gitlab.io/project-name),
you'll have to look for this configuration (base URL) on your SSG's
documentation and set it up to reflect this pattern.
For example, for a Jekyll site, the baseurl is defined in the Jekyll
configuration file, _config.yml. If your website URL is
https://john.gitlab.io/blog/, you need to add this line to _config.yml:
baseurl: "/blog"On the contrary, if you deploy your website after forking one of
our default examples, the baseurl will
already be configured this way, as all examples there are project
websites. If you decide to make yours a user or group website, you'll
have to remove this configuration from your project. For the Jekyll
example we've just mentioned, you'd have to change Jekyll's _config.yml to:
baseurl: ""Custom Domains
GitLab Pages supports custom domains and subdomains, served under HTTP or HTTPS. See GitLab Pages custom domains and SSL/TLS Certificates for more information.