Groups
With GitLab Groups, you can:
- Assemble related projects together.
- Grant members access to several projects at once.
For a video introduction to GitLab Groups, see GitLab University: Repositories, Projects and Groups.
Groups can also be nested in subgroups.
Find your groups by clicking Groups > Your Groups in the top navigation.
The Groups dropdown in the top navigation was introduced in GitLab 11.1.
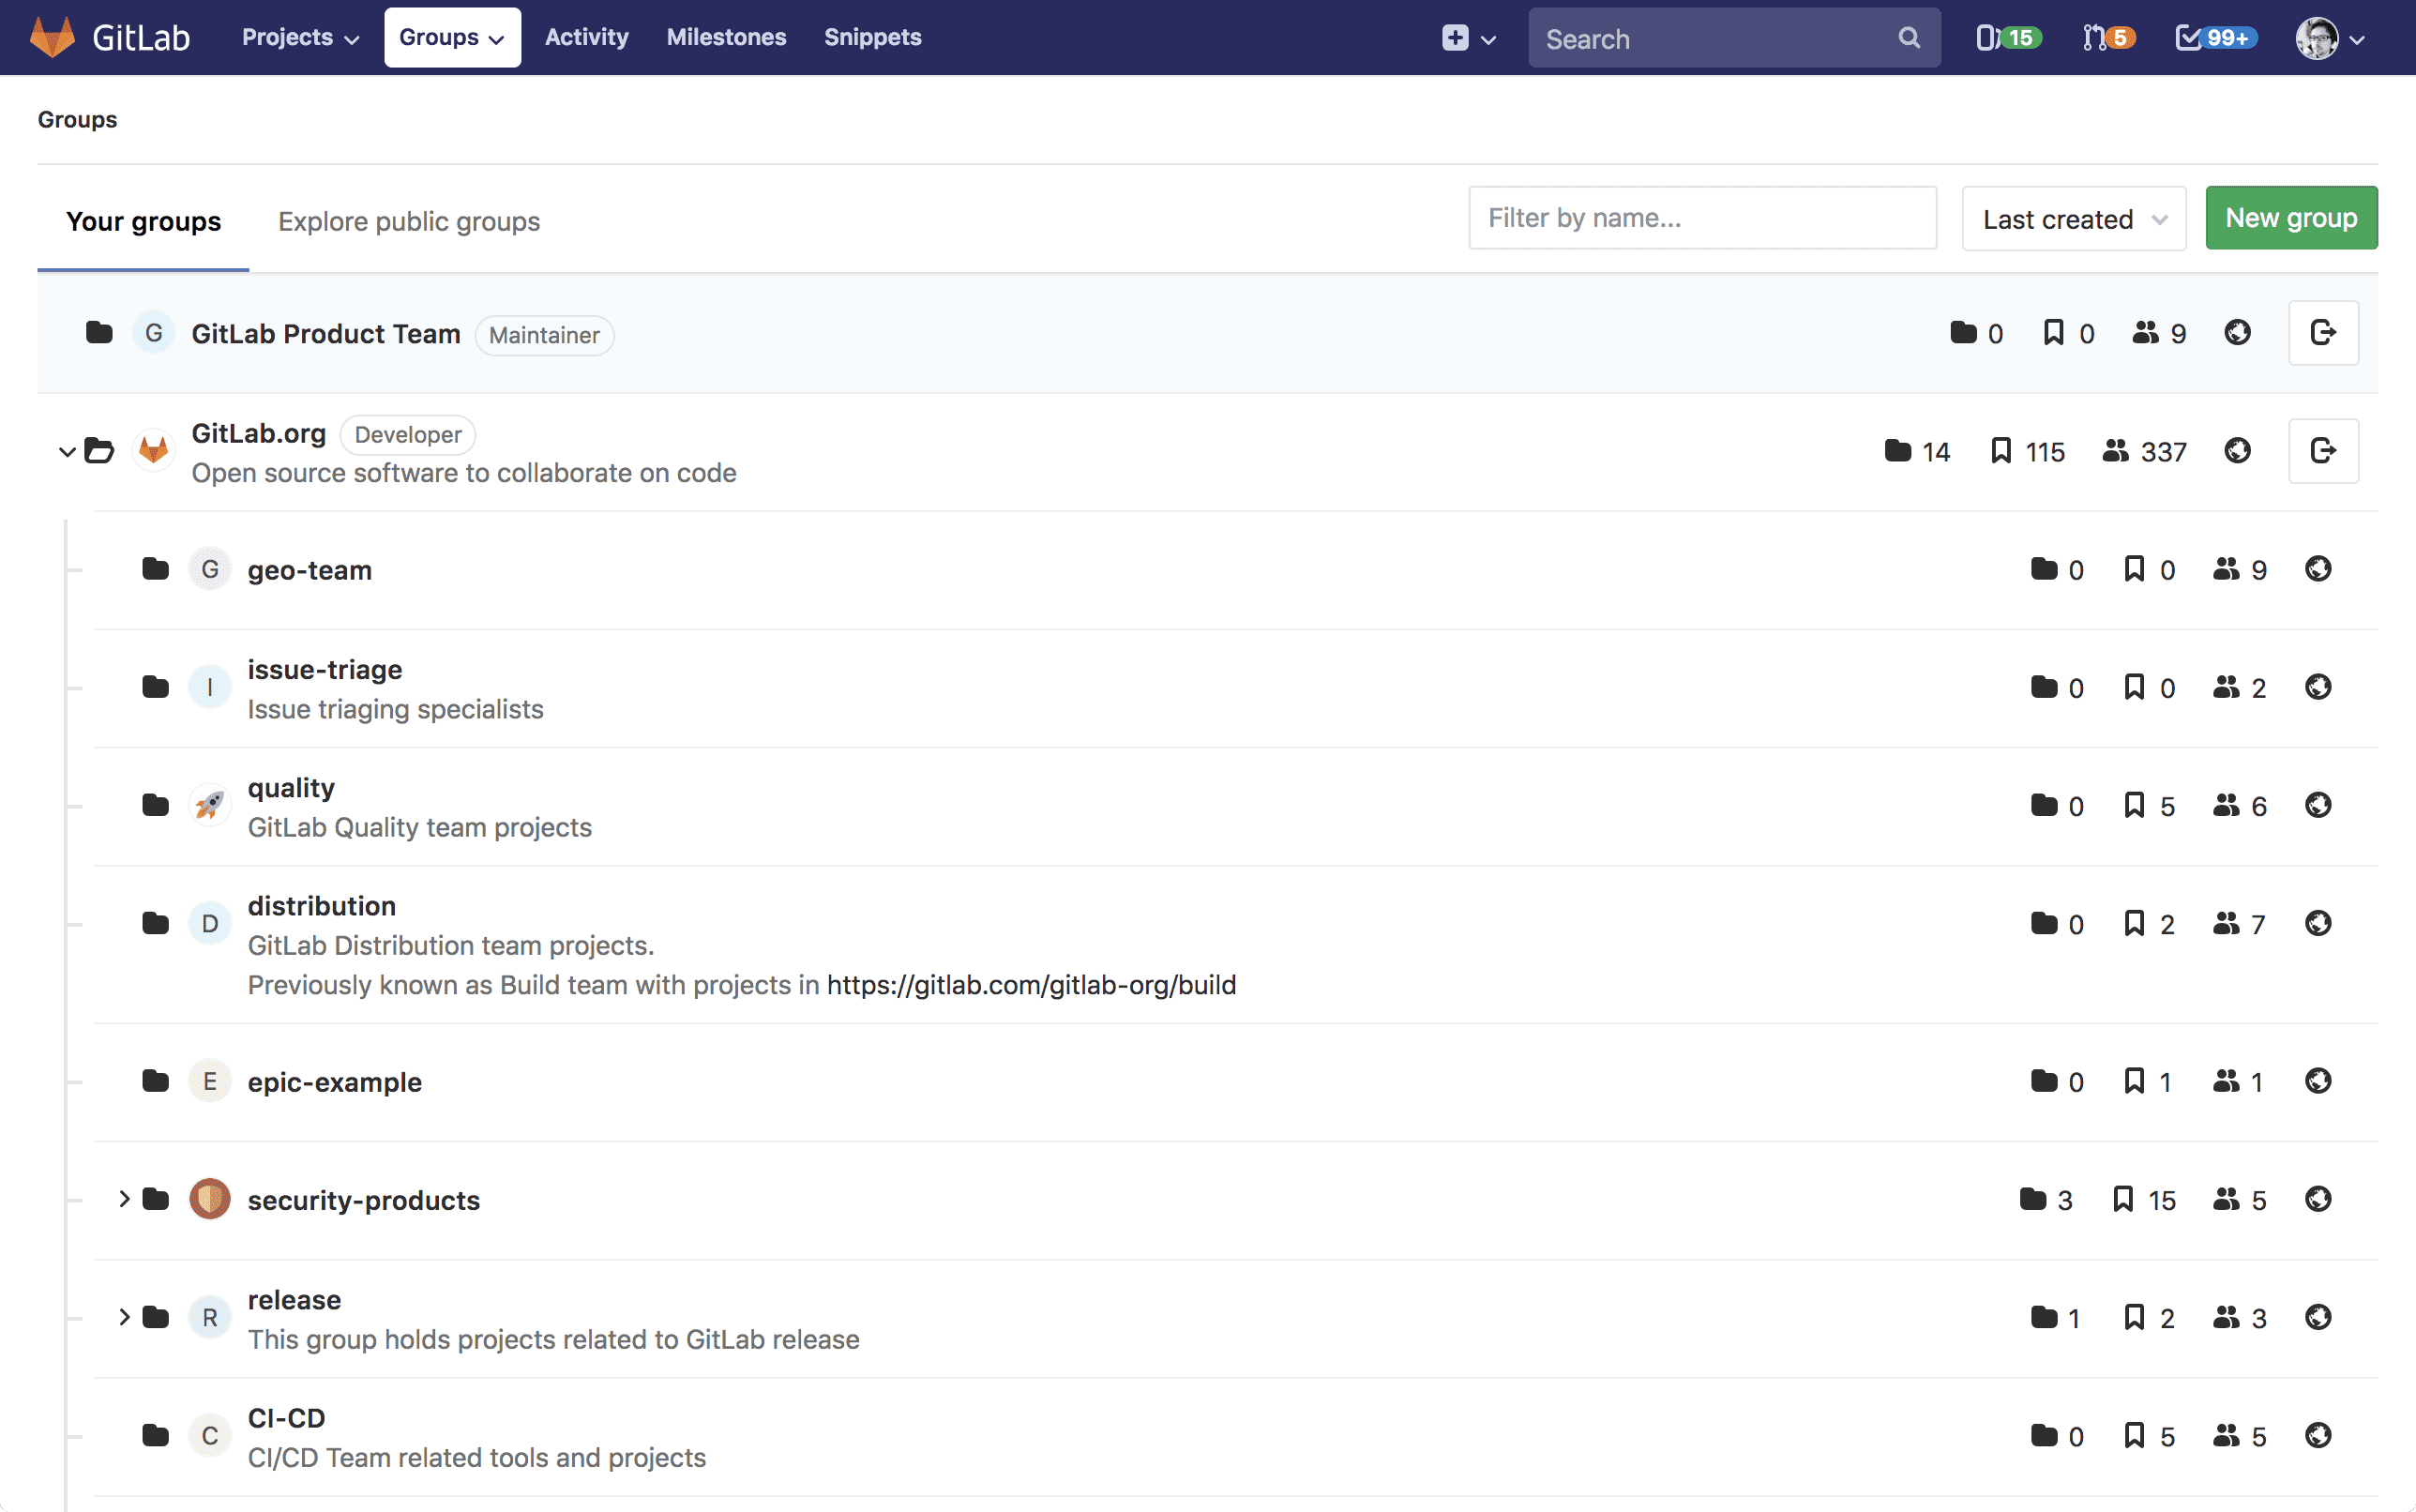
The Groups page displays:
- All groups you are a member of, when Your groups is selected.
- A list of public groups, when Explore public groups is selected.
Each group on the Groups page is listed with:
- How many subgroups it has.
- How many projects it contains.
- How many members the group has, not including members inherited from parent groups.
- The group's visibility.
- A link to the group's settings, if you have sufficient permissions.
- A link to leave the group, if you are a member.
Use cases
You can create groups for numerous reasons. To name a couple:
- Grant access to multiple projects and multiple team members in fewer steps by organizing related projects under the same namespace and adding members to the top-level group.
- Make it easier to
@mentionall of your team at once in issues and merge requests by creating a group and including the appropriate members.
For example, you could create a group for your company members, and create a subgroup for each individual team. Let's say you create a group called company-team, and you create subgroups in this group for the individual teams backend-team, frontend-team, and production-team.
- When you start a new implementation from an issue, you add a comment:
"
@company-team, let's do it!@company-team/backend-teamyou're good to go!" - When your backend team needs help from frontend, they add a comment:
"
@company-team/frontend-teamcould you help us here please?" - When the frontend team completes their implementation, they comment:
"
@company-team/backend-team, it's done! Let's ship it@company-team/production-team!"
Namespaces
In GitLab, a namespace is a unique name to be used as a user name, a group name, or a subgroup name.
http://gitlab.example.com/usernamehttp://gitlab.example.com/groupnamehttp://gitlab.example.com/groupname/subgroup_name
For example, consider a user named Alex:
- Alex creates an account on GitLab.com with the username
alex; their profile will be accessed underhttps://gitlab.example.com/alex - Alex creates a group for their team with the group name
alex-team; the group and its projects will be accessed underhttps://gitlab.example.com/alex-team - Alex creates a subgroup of
alex-teamwith the subgroup namemarketing; this subgroup and its projects will be accessed underhttps://gitlab.example.com/alex-team/marketing
By doing so:
- Any team member mentions Alex with
@alex - Alex mentions everyone from their team with
@alex-team - Alex mentions only the marketing team with
@alex-team/marketing
Issues and merge requests within a group
Issues and merge requests are part of projects. For a given group, you can view all of the issues and merge requests across all projects in that group, together in a single list view.
Bulk editing issues and merge requests
For details, see bulk editing issues and merge requests.
Create a new group
For a list of words that are not allowed to be used as group names see the reserved names.
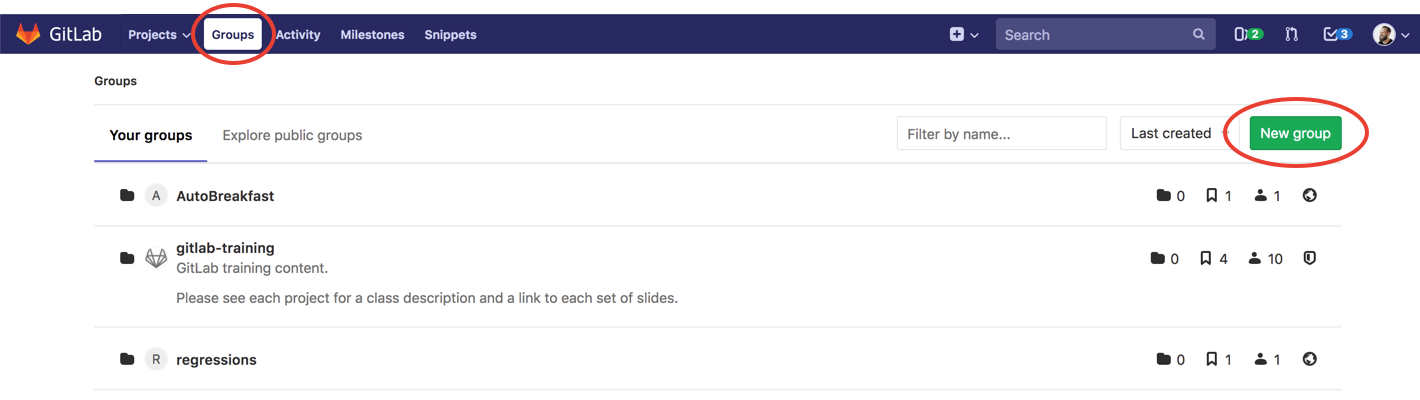
To create a new Group, either:
-
In the top menu, click Groups and then Your Groups, and click the green button New group.

-
Or, in the top menu, expand the
plussign and choose New group.

Add the following information:

- The Group name will automatically populate the URL. Optionally, you can change it.
This is the name that displays in group views.
The name can contain only:
- Alphanumeric characters
- Underscores
- Dashes and dots
- Spaces
- The Group URL is the namespace under which your projects will be hosted.
The URL can contain only:
- Alphanumeric characters
- Underscores
- Dashes and dots (it cannot start with dashes or end in a dot)
- Optionally, you can add a brief description to tell others what this group is about.
- Optionally, choose an avatar for your group.
- Choose the visibility level.
For more details on creating groups, watch the video GitLab Namespaces (users, groups and subgroups).
Add users to a group
A benefit of putting multiple projects in one group is that you can give a user to access to all projects in the group with one action.
Add members to a group by navigating to the group's dashboard and clicking Members.
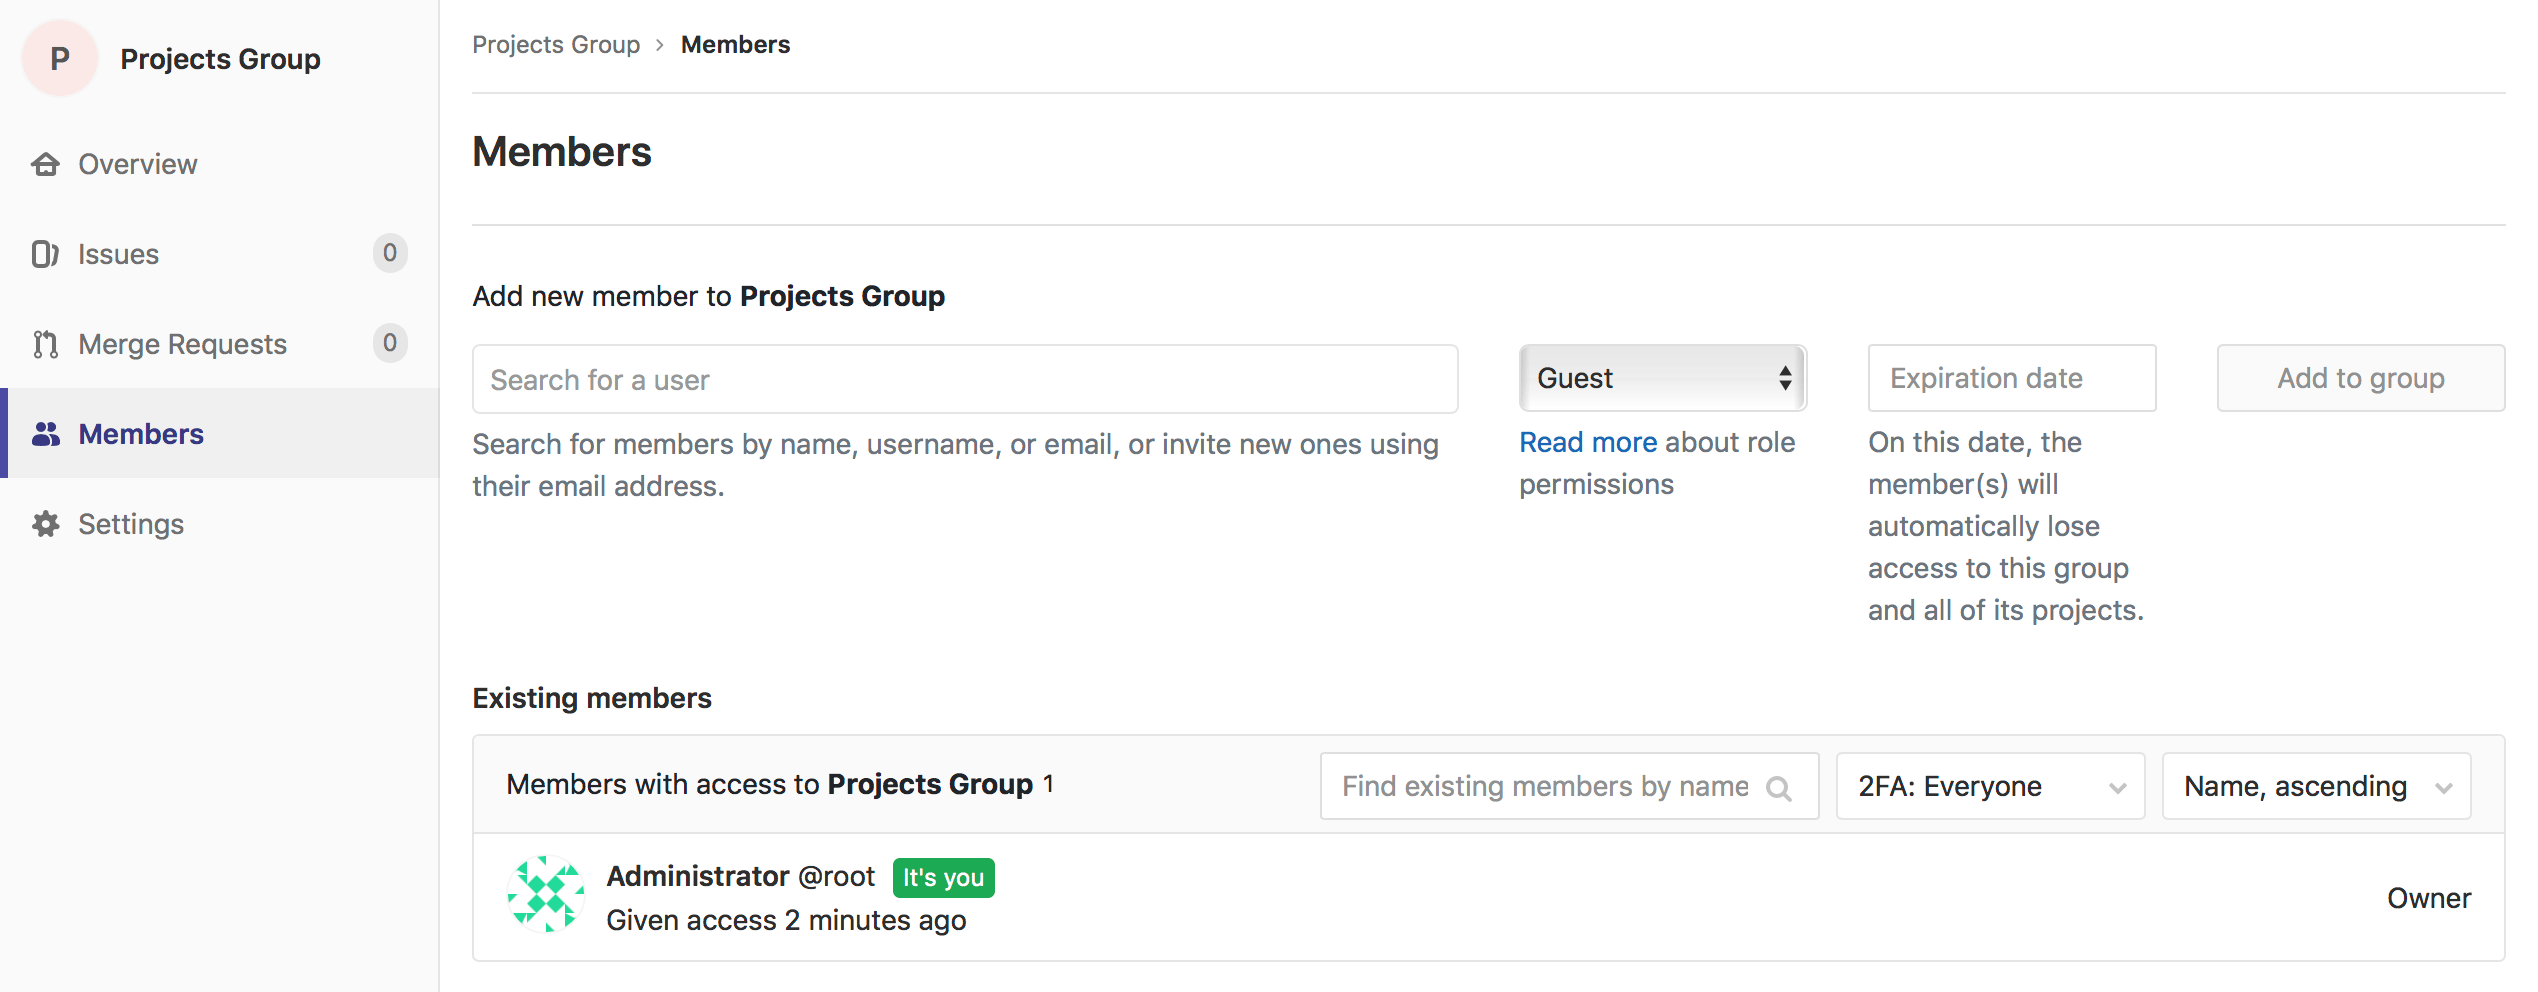
Select the permission level, and add the new member. You can also set the expiring date for that user; this is the date on which they will no longer have access to your group.
Consider a group with two projects:
- On the Group Members page, you can now add a new user to the group.
- Now, because this user is a Developer member of the group, they automatically gets Developer access to all projects within that group.
To increase the access level of an existing user for a specific project, add them again as a new member to the project with the desired permission level.
Request access to a group
As a group owner, you can enable or disable the ability for non members to request access to your group. Go to the group settings, and click Allow users to request access.
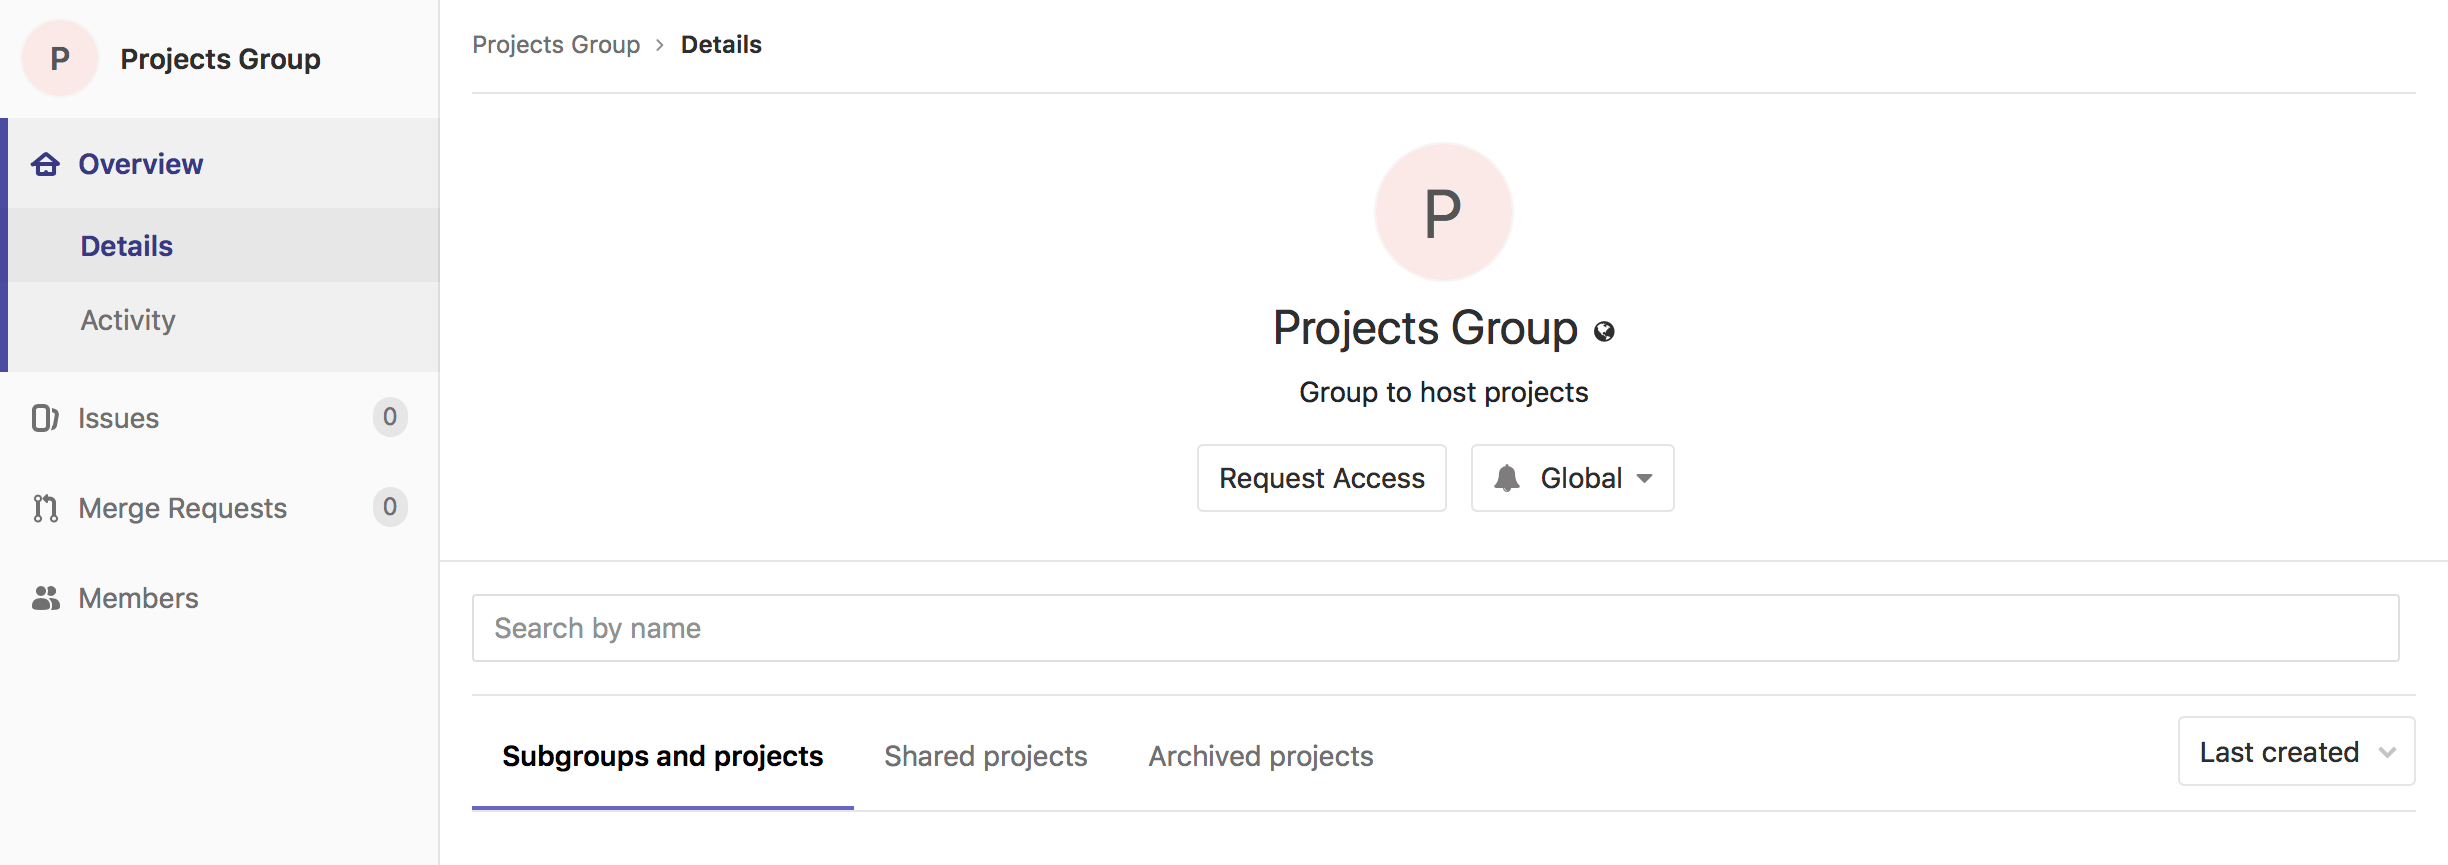
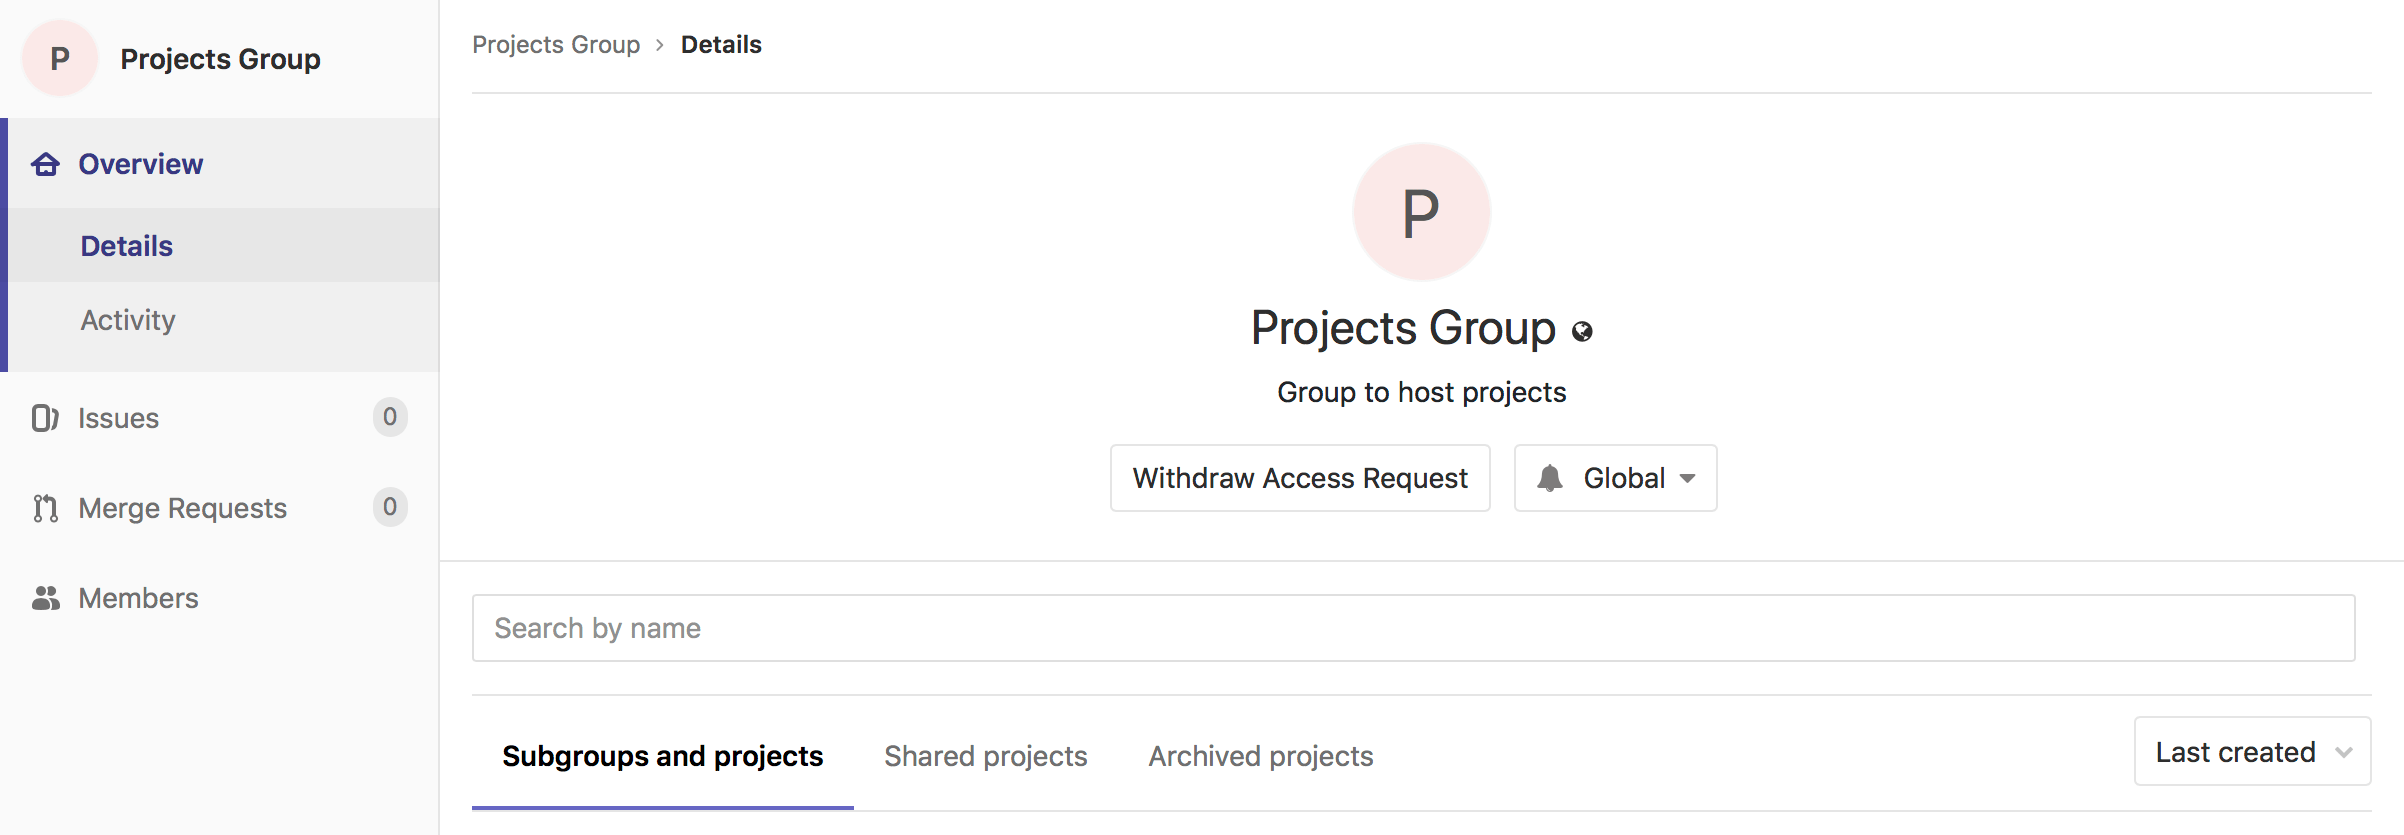
As a user, you can request to be a member of a group, if that setting is enabled. Go to the group for which you'd like to be a member, and click the Request Access button on the right side of your screen.
Group owners and maintainers will be notified of your request and will be able to approve or decline it on the members page.

If you change your mind before your request is approved, just click the Withdraw Access Request button.
Add projects to a group
There are two different ways to add a new project to a group:
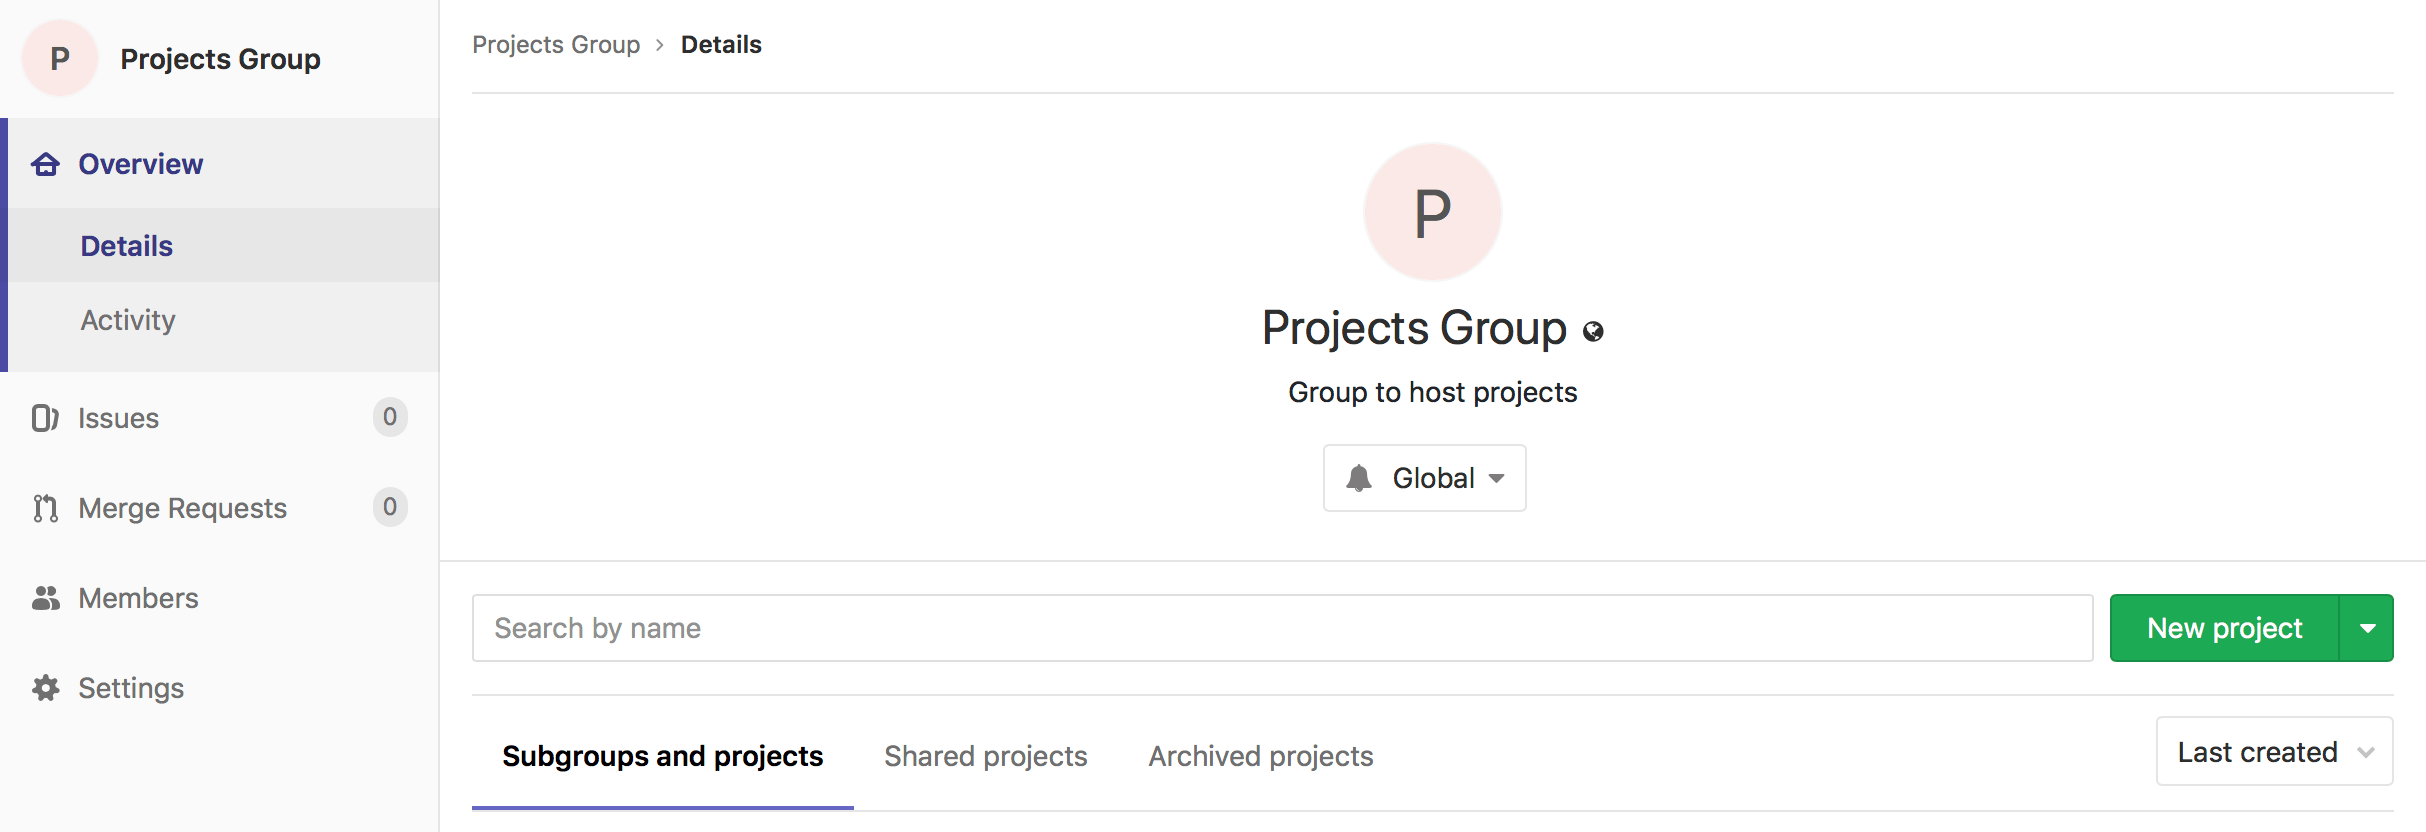
-
Select a group, and then click New project. You can then continue creating your project.
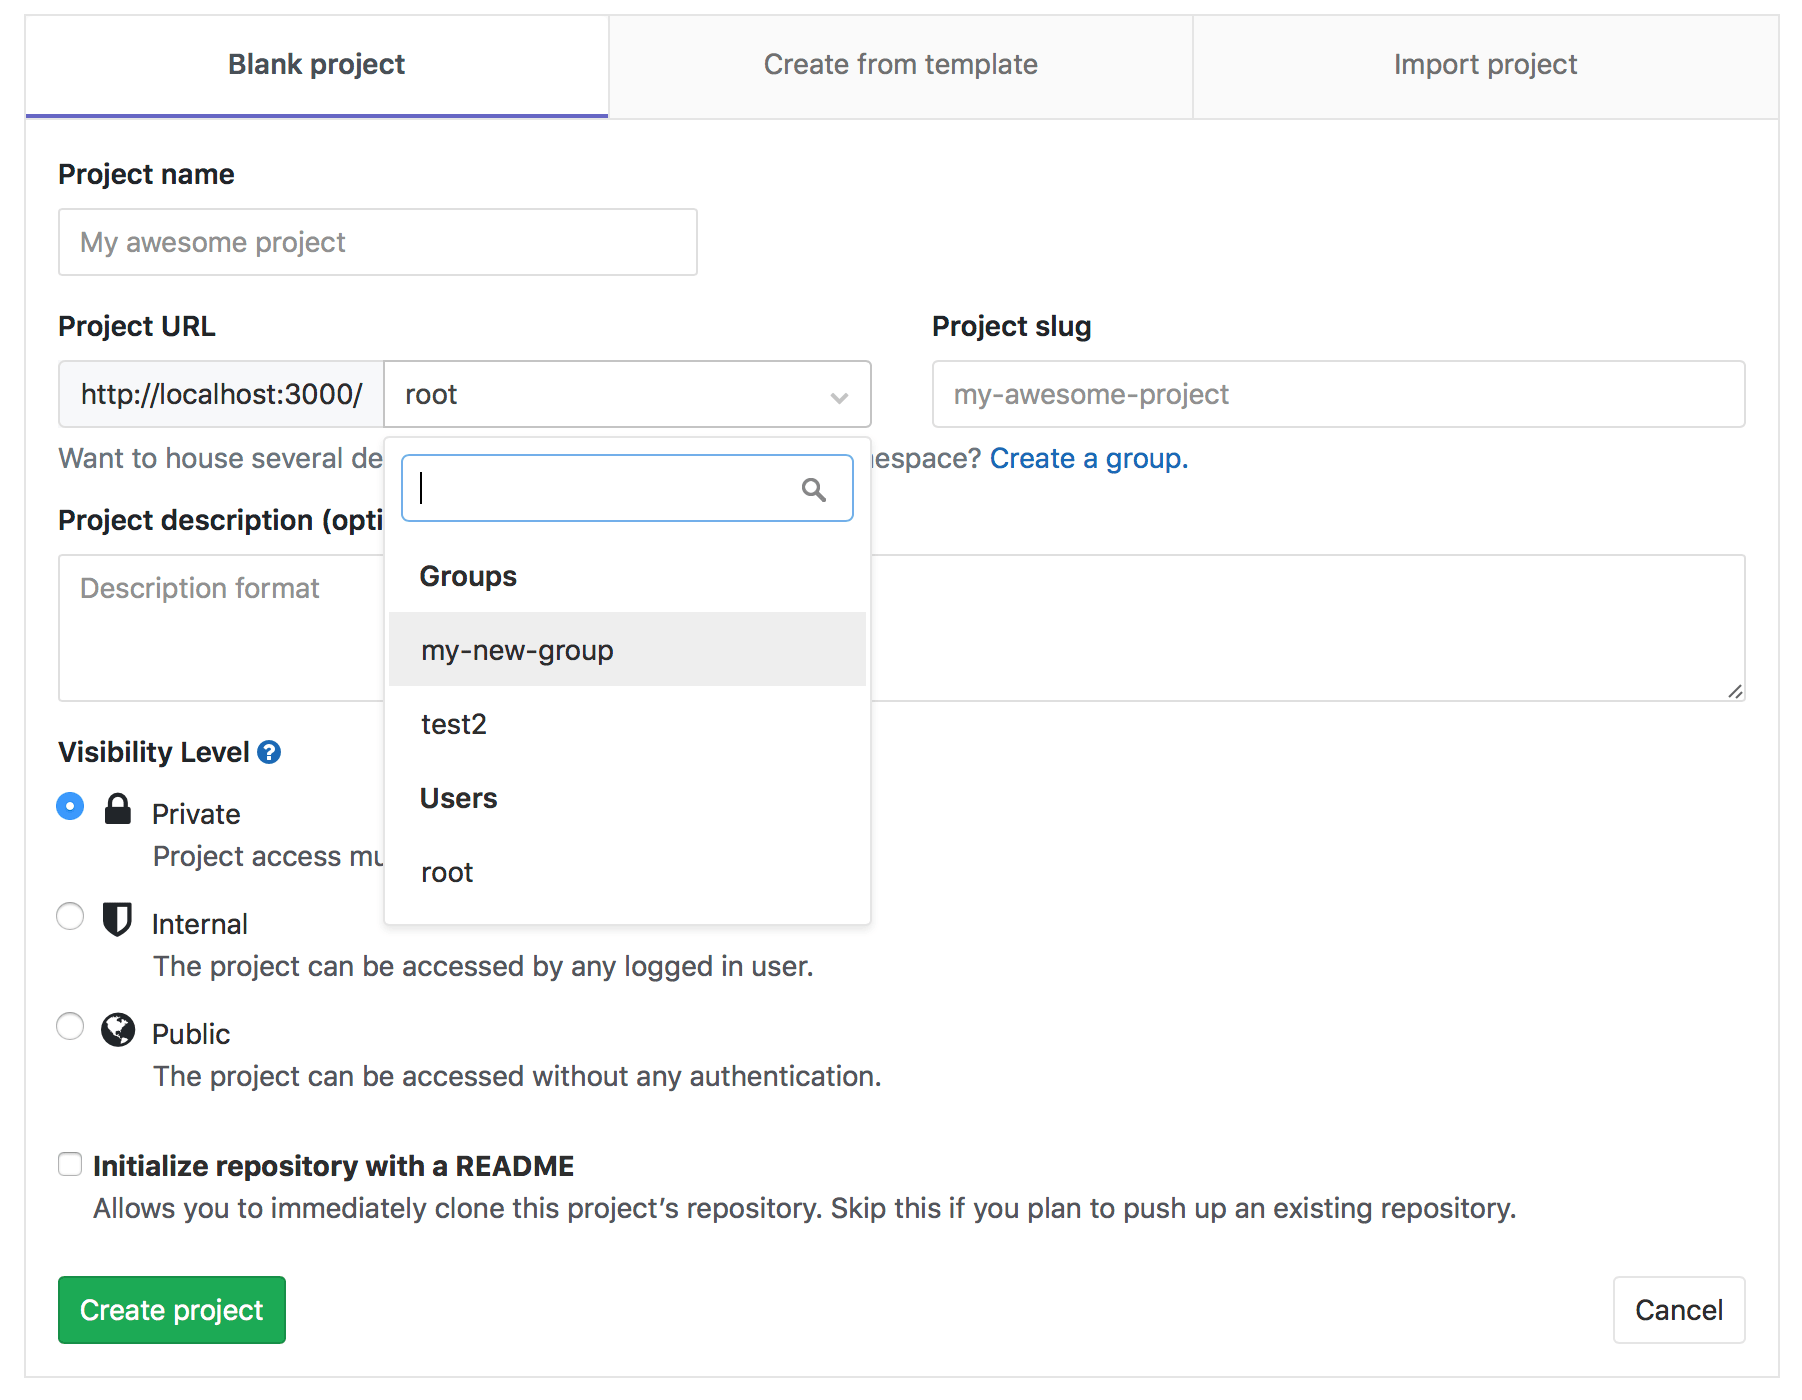
-
While you are creating a project, select a group namespace you've already created from the dropdown menu.
Default project-creation level
Introduced in GitLab Premium 10.5. Brought to GitLab Starter in 10.7. Moved to GitLab Core in 11.10.
Group owners and administrators can allow users with the Developer role to create projects under groups.
By default, Developers and Maintainers can create projects under a group. You can change this setting for a specific group within the group settings, or you can set this option globally in the Admin area at Settings > General > Visibility and access controls (you must be a GitLab administrator).
Available settings are No one, Maintainers, or Developers + Maintainers.
Transfer projects into groups
Learn how to transfer a project into a group.
Sharing a project with a group
You can share your projects with a group and give all group members access to the project at once.
Alternatively, you can lock the sharing with group feature.
Manage group memberships via LDAP
In GitLab Enterprise Edition, it is possible to manage GitLab group memberships using LDAP groups. See the GitLab Enterprise Edition documentation for more information.
Epics (ULTIMATE)
Introduced in GitLab Ultimate 10.2.
Epics let you manage your portfolio of projects more efficiently and with less effort by tracking groups of issues that share a theme, across projects and milestones.
Group Security Dashboard (ULTIMATE)
Get an overview of the vulnerabilities of all the projects in a group and its subgroups.
Learn more about the Group Security Dashboard.
Insights (ULTIMATE)
Introduced in GitLab Ultimate 12.0.
Configure the Insights that matter for your groups or projects, allowing users to explore data such as:
- Triage hygiene
- Issues created/closed per a given period
- Average time for merge requests to be merged
- Much more
Transferring groups
From GitLab 10.5, you can transfer groups in the following ways:
- Transfer a subgroup to a new parent group.
- Convert a top-level group into a subgroup by transferring it to the desired group.
- Convert a subgroup into a top-level group by transferring it out of its current group.
When transferring groups, note:
- Changing a group's parent can have unintended side effects. See Redirects when changing repository paths.
- You can only transfer groups to groups you manage.
- You must update your local repositories to point to the new location.
- If the parent group's visibility is lower than the group's current visibility, visibility levels for subgroups and projects will change to match the new parent group's visibility.
- Only explicit group membership is transferred, not inherited membership. If the group's owners have only inherited membership, this leaves the group without an owner. In this case, the user transferring the group becomes the group's owner.
Group settings
After creating a group, you can manage its settings by navigating to the group's dashboard, and clicking Settings.
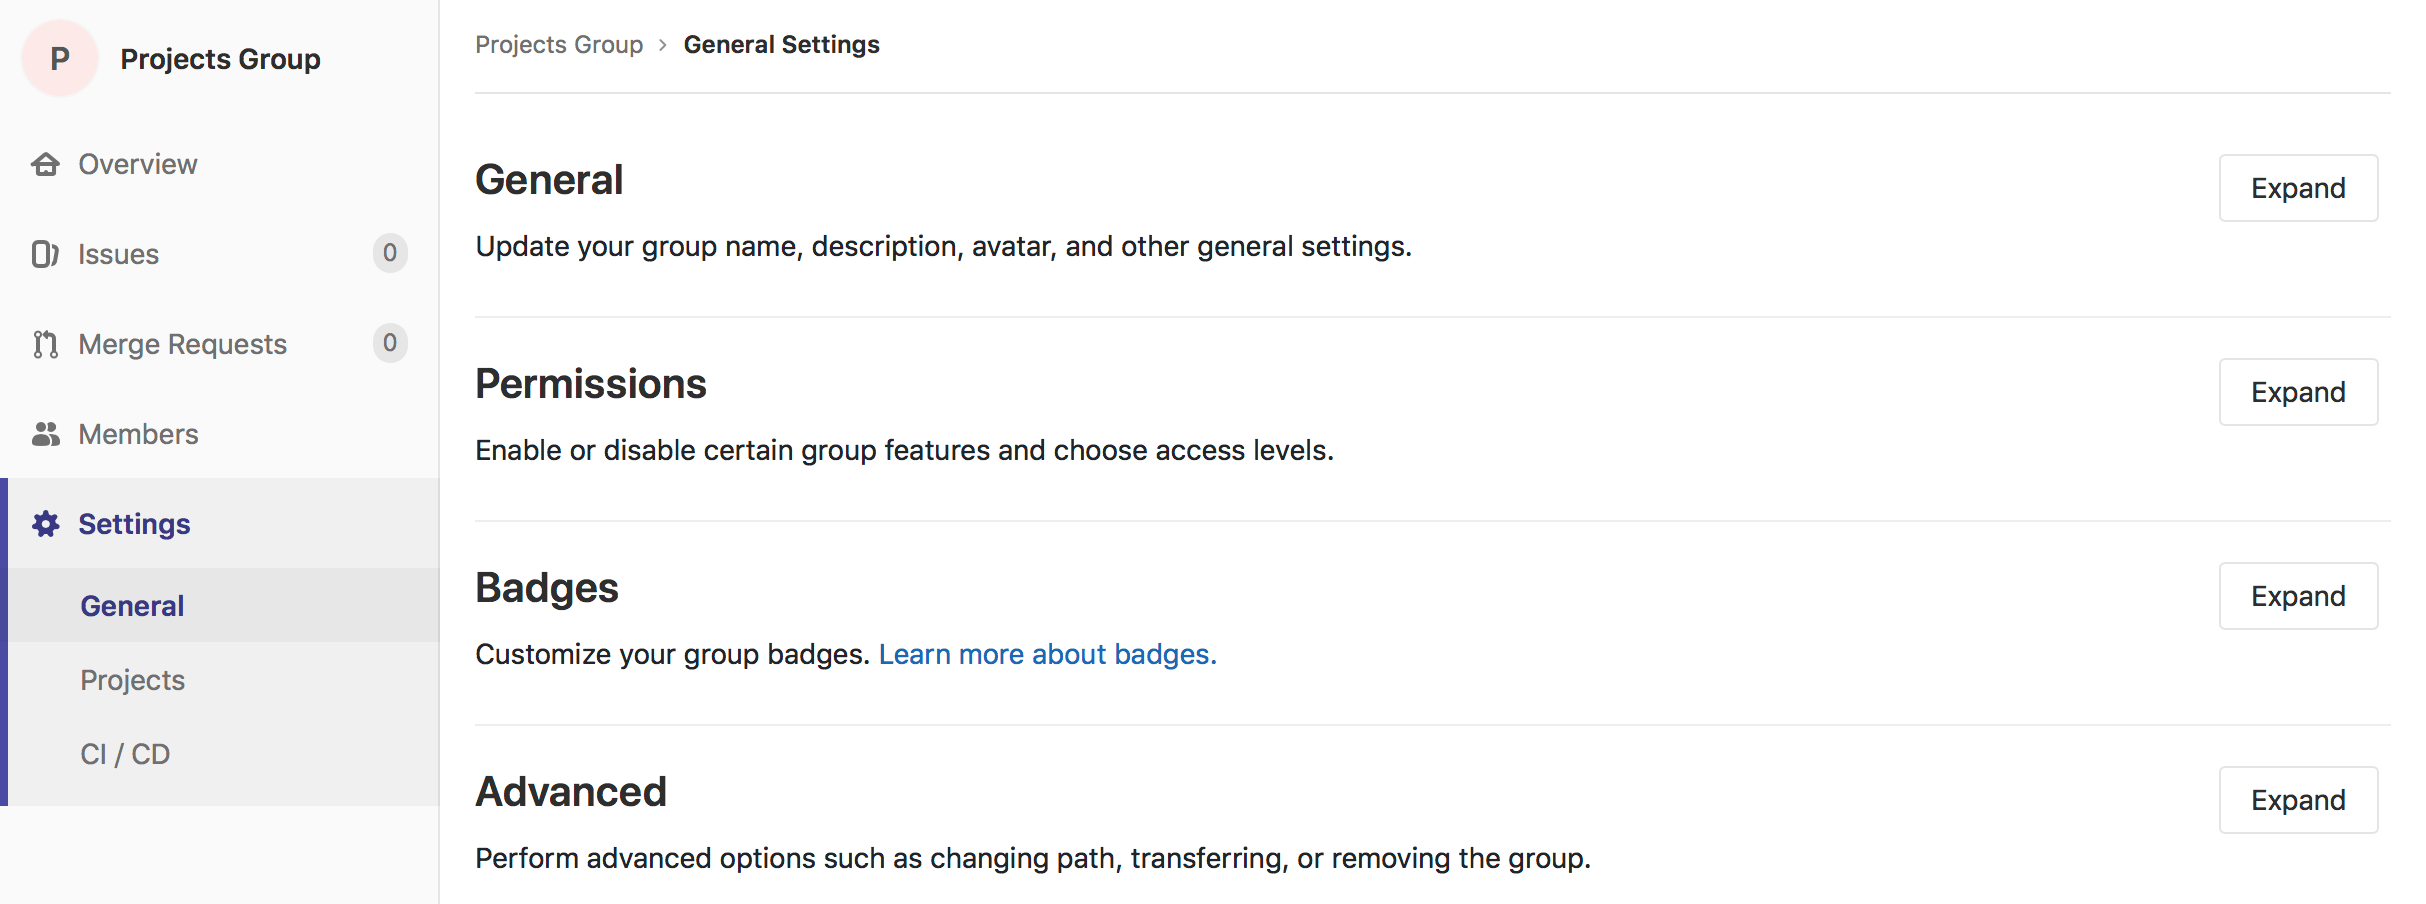
General settings
In addition to editing any settings you previously set when creating the group, you can also access further configurations for your group.
Changing a group's path
Changing a group's path can have unintended side effects. Read how redirects will behave before proceeding.
If you are vacating the path so it can be claimed by another group or user, you may need to rename the group, too, since both names and paths must be unique.
To change your group path:
- Navigate to your group's Settings > General page.
- Expand the Path, transfer, remove section.
- Enter a new name under Change group path.
- Click Change group path.
CAUTION: Caution: It is currently not possible to rename a namespace if it contains a project with Container Registry tags, because the project cannot be moved.
TIP: TIP: If you want to retain ownership over the original namespace and protect the URL redirects, then instead of changing a group's path or renaming a username, you can create a new group and transfer projects to it.
Enforce 2FA to group members
Add a security layer to your group by enforcing two-factor authentication (2FA) for all group members.
Share with group lock
Prevent projects in a group from sharing a project with another group to enable tighter control over project access.
For example, let's say you have two distinct teams (Group A and Group B) working together in a project, and to inherit the group membership, you share the project between the two groups A and B. Share with group lock prevents any project within the group from being shared with another group, guaranteeing that only the right group members have access to those projects.
To enable this feature, navigate to the group settings page. Select Share with group lock and Save the group.

Member Lock (STARTER)
Member lock lets a group owner prevent any new project membership to all of the projects within a group, allowing tighter control over project membership.
For example, if you want to lock the group for an Audit Event, enable Member lock to guarantee that project membership cannot be modified during that audit.
To enable this feature:
- Navigate to the group's Settings > General page.
- Expand the Permissions, LFS, 2FA section, and select Member lock.
- Click Save changes.

This will disable the option for all users who previously had permissions to operate project memberships, so no new users can be added. Furthermore, any request to add a new user to a project through API will not be possible.
IP access restriction (ULTIMATE ONLY)
Introduced in GitLab Ultimate 12.0.
To make sure only people from within your organization can access particular resources, you have the option to restrict access to groups and their underlying projects, issues, etc, by IP address. This can help ensure that particular content doesn't leave the premises, while not blocking off access to the entire instance.
Add whitelisted IP subnet using CIDR notation to the group settings and anyone coming from a different IP address won't be able to access the restricted content.
Restriction currently applies to UI, API access is not restricted. To avoid accidental lock-out, admins and group owners are are able to access the group regardless of the IP restriction.
Allowed domain restriction (PREMIUM ONLY)
Introduced in GitLab Premium 12.2.
You can restrict access to groups and their underlying projects by allowing only users with email addresses in particular domains to be added to the group.
Add email domains you want to whitelist and users with emails from different domains won't be allowed to be added to this group.
Some domains cannot be restricted. These are the most popular public email domains, such as:
gmail.comyahoo.comhotmail.comaol.commsn.comhotmail.co.ukhotmail.frlive.comoutlook.comicloud.com
To enable this feature:
- Navigate to the group's Settings > General page.
- Expand the Permissions, LFS, 2FA section, and enter domain name into Restrict membership by email field.
- Click Save changes.
This will enable the domain-checking for all new users added to the group from this moment on.
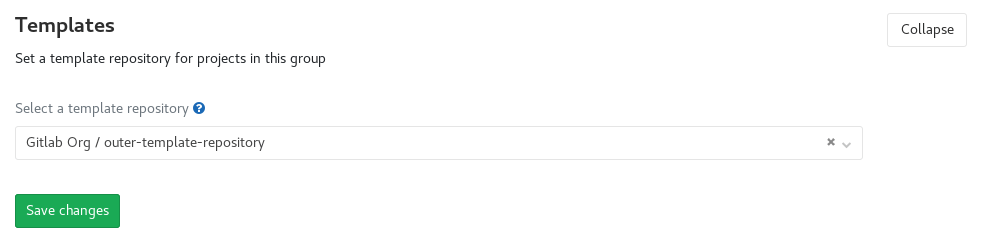
Group file templates (PREMIUM)
Group file templates allow you to share a set of templates for common file types with every project in a group. It is analogous to the instance template repository feature, and the selected project should follow the same naming conventions as are documented on that page.
You can only choose projects in the group as the template source. This includes projects shared with the group, but it excludes projects in subgroups or parent groups of the group being configured.
You can configure this feature for both subgroups and parent groups. A project in a subgroup will have access to the templates for that subgroup, as well as any parent groups.

To enable this feature, navigate to the group settings page, expand the Templates section, choose a project to act as the template repository, and Save group.
Group-level project templates (PREMIUM)
Define project templates at a group level by setting a group as the template source. Learn more about group-level project templates.
Disabling email notifications
You can disable all email notifications related to the group, which also includes it's subgroups and projects.
To enable this feature:
- Navigate to the group's Settings > General page.
- Expand the Permissions, LFS, 2FA section, and select Disable email notifications.
- Click Save changes.
Advanced settings
- Projects: View all projects within that group, add members to each project, access each project's settings, and remove any project, all from the same screen.
- Webhooks: Configure webhooks for your group.
- Kubernetes cluster integration: Connect your GitLab group with Kubernetes clusters.
- Audit Events: View Audit Events for the group. (STARTER ONLY)
- Pipelines quota: Keep track of the pipeline quota for the group.
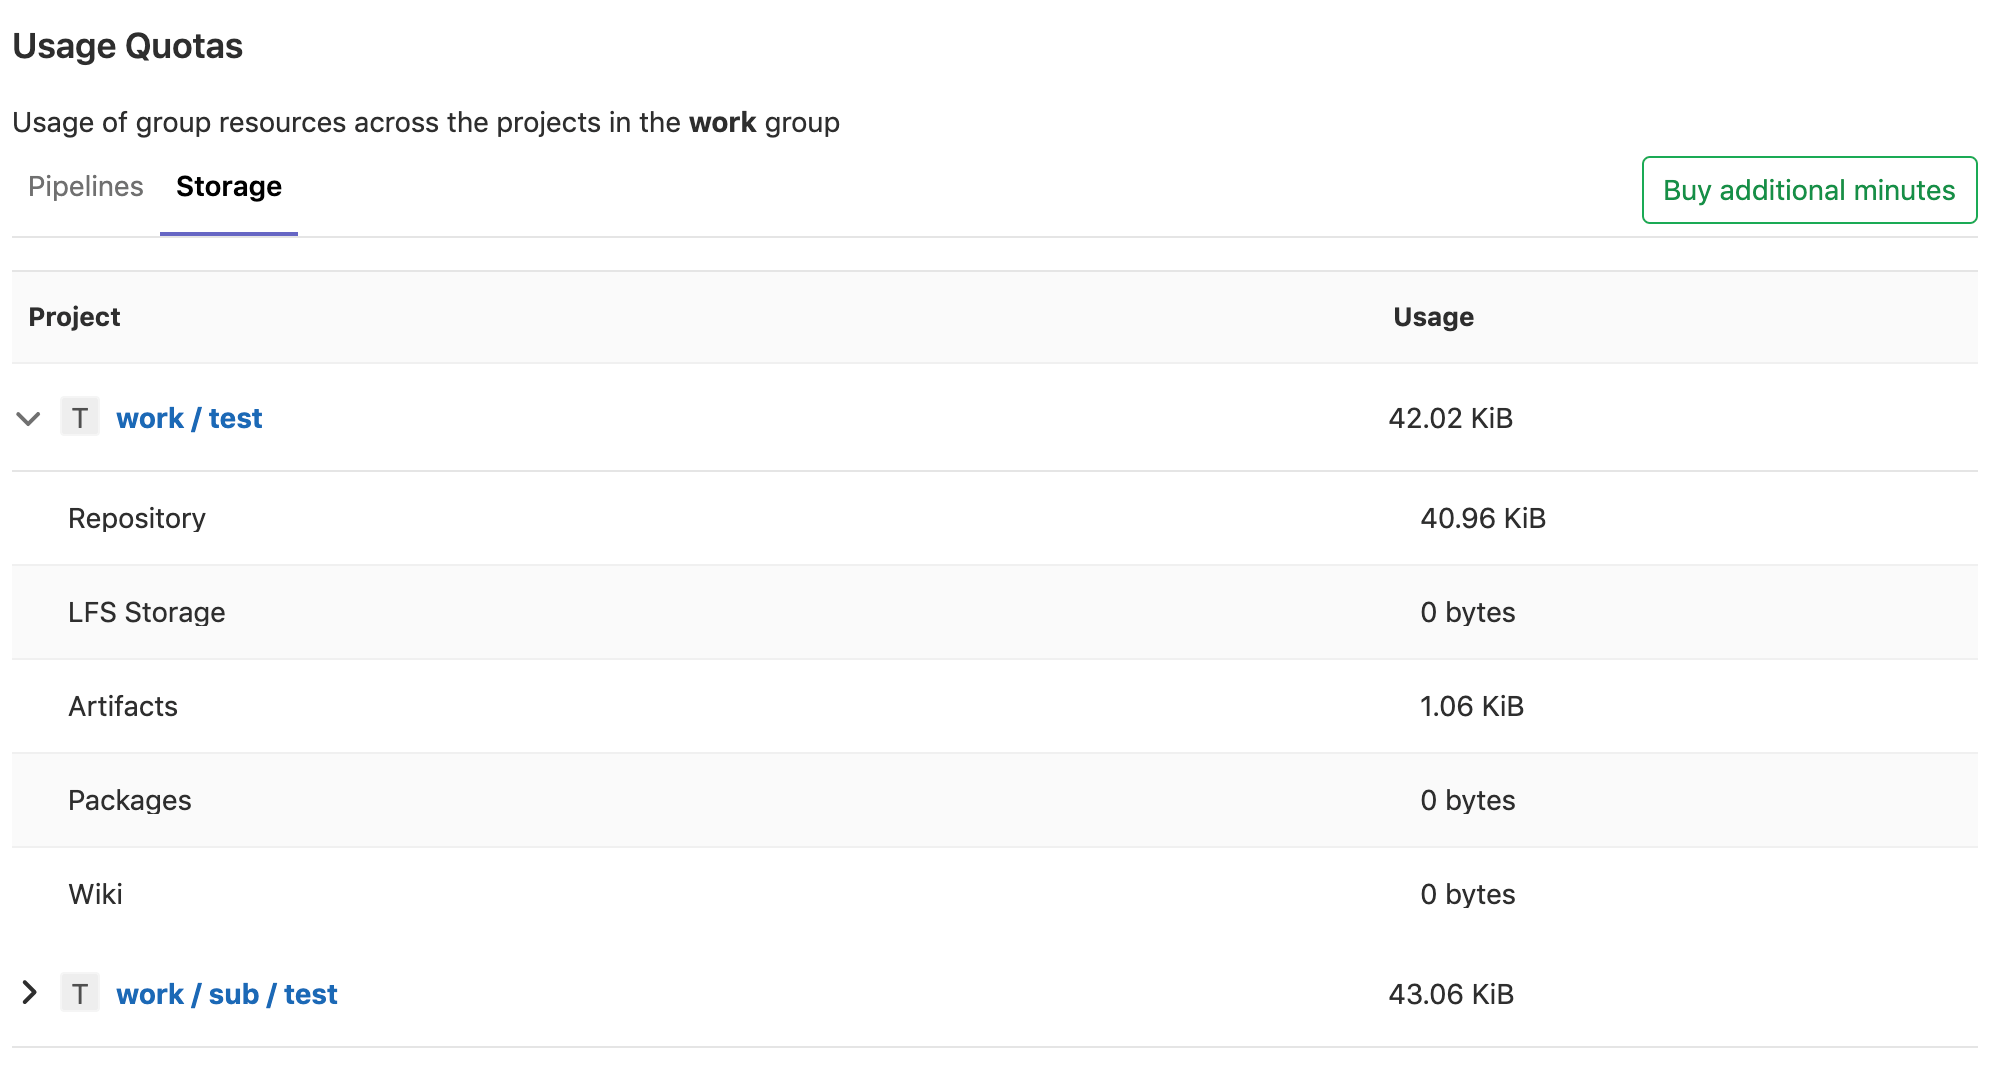
Storage usage quota (STARTER)
Introduced in GitLab Starter 12.0.
A group owner can check the aggregated storage usage for all the project in a group, sub-groups included, in the Storage tab of the Usage Quotas page available to the group page settings list.
User contribution analysis (STARTER)
With GitLab Contribution Analytics, you have an overview of the contributions (pushes, merge requests, and issues) performed by your group members.
Issues analytics (PREMIUM)
With GitLab Issues Analytics, you can see a bar chart of the number of issues created each month in your groups.
Dependency Proxy (PREMIUM)
Use GitLab as a dependency proxy for upstream Docker images.